Now that our new little one is here, I figured I'd share some of the ways we stay frugal when it comes to having a baby. Just like many of you out there, our family isn't made of money, so I try to save whenever and wherever I can. But let's face it- babies are EXPENSIVE!!! All those toys, tiny clothes, diapers, cribs, and stuff that goes along with having a little one can cost big $$$, and it all adds up fast if you're not careful.
A lot of families save on baby gear by passing it down to younger siblings when they come along. This is a wonderful way to save on big ticket items such as cribs, clothing, and furniture! Unfortunately for us, this couldn't happen with this baby. We have moved since Thing 3 was born and had gotten rid of most of the baby stuff to make room in our crowded house. Even if we had saved some things, safety standards had changed pretty drastically in that time, so many things would have to be replaced anyway (namely the crib and car seat). We basically had to start completely from scratch with this baby, just as we did with our first. This time though, I had learned a few tips and tricks that saved us loads of $$$
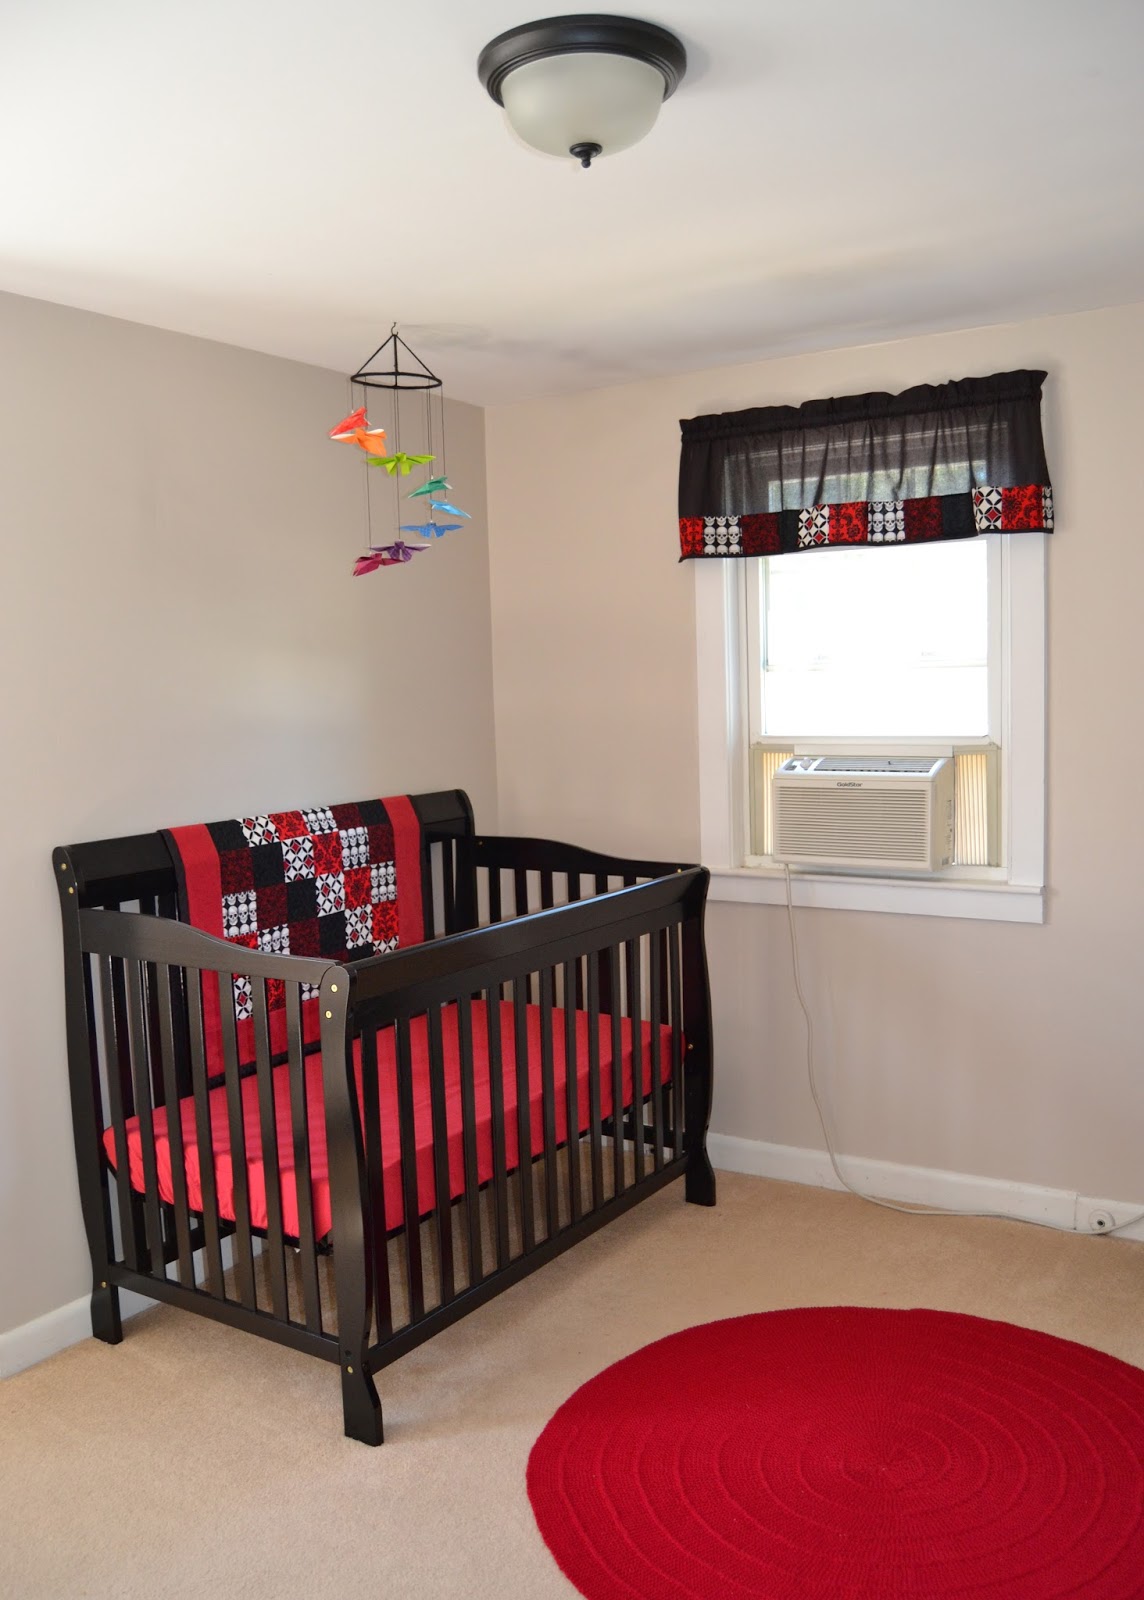
Let's start off with the baby's bedroom. Here is where you can easily spend thousands of dollars buying cribs, changing tables, furniture, decorations, and cute themed bedding. We managed to spend only a few hundred dollars for everything, and most of it was purchased brand new. Many items were handmade to not only save money, but also give us a custom look that we couldn't find in any baby shop. Here's a little breakdown of what we spent in the baby's bedroom:
Crib

This is a must-have item in my opinion. Baby needs somewhere safe to sleep! This is also where a huge chunk of cash can be spent. Cribs can range in price from a few hundred dollars to over a thousand dollars, depending on which one you get. That's right folks, they cost just as much as a full-sized bed for an adult. Add to that the cost of a crib mattress, and you're wallet is pretty empty. Safety standards for cribs have changed drastically in the past few years, so we weren't comfortable purchasing a used crib. We saved money here by shopping around for the best price and combining sales and coupons to make it even cheaper. The best price we found was on sale online at Babies R Us. We just happen to be on their mailing list and received a coupon for 20% off any item that we combined with hubby's employee discount. The original cost of the crib was $200, plus shipping of course which was another $20. Pretty inexpensive compared to most cribs out there. The mattress we chose cost $60, so we're in for a grand total of about $280 so far. What did we end up paying? After the coupon and discount we ended up paying just under $200 for everything, so it was like we got the mattress for free. This crib can also convert to a toddler bed and a full-sized headboard and footboard, so we can avoid paying for those down the road. Once we are done with the crib we plan on selling it and making back some of the money we spent.
Dresser
Dressers can cost even more than a crib, if you can believe it. We got lucky here and had a dresser in the basement that belonged to Thing 3. Huzzah for hand-me-downs! It was really banged up from some serious abuse from the boys, so it needed to be refinished and repaired. The total cost of paint and materials to refinish it was about $50. Originally, this dresser would have cost around $300-$400, so we saved a big chunk of change with this. Our dresser also doubles as a changing table, so we were able to skip buying that completely. The changing pad on top was purchased for $5 at a yard sale.
Rocking Chair
Here was our biggest splurge in the baby's room. For midnight feedings, a glider rocker is a necessary item to me. Not so much for the baby, but more for
my comfort. I spend countless hours nursing my babies in the middle of the night, so having a comfortable place to sit is important. I wanted a glider that was solid wood with nice soft cushions and an ottoman so I could put my feet up and relax while nursing at 3am. This is an item that I was OK buying used, as long as it was in good condition. We weren't able to find anything locally unfortunately, so we ended up purchasing new. Again I shopped around for the best deal and ended up purchasing online from Amazon.com. The price for this was $230, thankfully with free shipping. That's right people, I spent more on the rocking chair than I did on the crib or dresser. Consider this though- some glider rockers can cost $1000 for just the rocker, no ottoman! I'm hoping to get lots of use from this chair, and I'm sure it will be useful for many years after baby is done nursing.
Bedding & Accessories
Many parents really go crazy purchasing themed bedding and accessories to make the baby's nursery ultra cutesy. There are so many options for crib blankets, curtains, crib bumpers, sheets, mobiles- you name it, and all in adorable themes with cute animals or pretty flowers on them. I'm not a cutesy kind of gal, so it was easy to skip all these in the store and just make my own. I found loads of tutorials online and ended up sewing the crib sheets, changing pad covers, curtains, and baby quilt myself in funky black and red fabrics. The crib sheets were made from some red flannel sheets that I scored for free (my favorite price) using a tutorial on the
Prudent Baby website. The changing pad covers were made from the same sheets using
this tutorial, with a few modifications. The
curtains were made using fabric leftovers in my stash and extra squares from the quilt, so they were basically free. I knit the area rug using yarn from my stash that a friend had given me and
this free pattern, so again it cost me nothing. We skipped the crib bumper, both to save money and because they can be a potential safety hazard. The only bedding I paid for was the materials used to make the quilt. I had some fabric in my stash already and the rest I purchased with coupons, so it only cost about $20. That's it- just $20 for a custom bedding set!
The rainbow butterfly mobile was also made super cheap. Thing 1 just happened to have origami paper in her room, so I used a few sheets of that along with a wire ring from a broken tomato cage and some scrap yarn to make an origami butterfly mobile for FREE. I found the instructions for the origami butterfly
here.
For those of you keeping a tally, we spent about $500 total for all our nursery furniture and accessories. Could we have saved more? Possibly. Still, I'm quite happy with what we have, and it was a lot of fun making everything :o)